
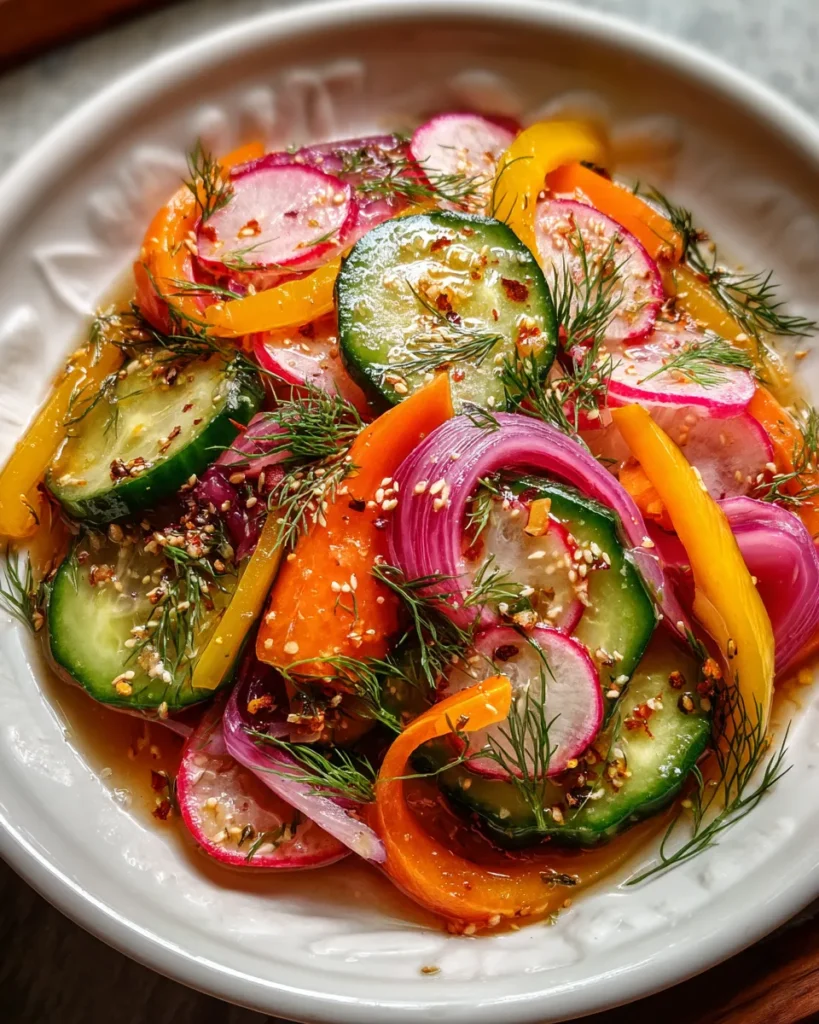
These refrigerator pickles are nothing short of a flavor-packed adventure straight from your own kitchen. Crunchy, tangy, and refreshingly bright, they add a vibrant pop to any meal. Every bite delivers that satisfying snap of fresh cucumbers and the sweet bite of carrots, all dancing together in a zesty bath of vinegar, garlic, and spices. The beauty of this recipe is how approachable it is: in just 15 minutes of prep and a quick 10-minute simmer of the pickling brine, you set the stage for homemade pickles that taste like they’ve been fermenting for weeks. Best of all, this beginner-friendly lunch course begs to be shared—whether on top of tacos, beside a sandwich, or simply enjoyed on their own as a tangy snack.
I still remember the first time I whipped up a batch on a lazy Sunday afternoon. I had a bunch of colorful veggies sitting on the counter, and the idea of turning them into crisp, refrigerator pickles was too good to pass up. From the moment the warm, vinegar-infused steam hit my face, I knew I was in for something special. I tossed in garlic cloves and mustard seeds, added a pinch of red pepper flakes just for a playful kick, and sealed everything into glass jars. After a 24-hour wait (the hardest part!), I dove in and was rewarded with that sweet-tart harmony and a satisfying crunch. It’s a simple ritual, really—wash, slice, brine, chill—and before you know it, you’ve got four weeks of crunchy tangy joy waiting in your fridge.
Before diving into the pickling process, let’s talk about what makes these veggies sing. Each ingredient plays a star role in creating that perfect balance of crisp texture and vibrant flavor. Whether you’re a seasoned home cook or a beginner, knowing the purpose behind each component can elevate your pickling game and let you customize to your heart’s content.
These are the backbone of any classic pickle. Pickling cucumbers hold their firm texture even after soaking in the brine, ensuring a satisfying crunch in every bite.
Their natural sweetness provides a lovely contrast to the tangy vinegar, while the bright orange hue adds visual appeal to your jars.
With a peppery edge, radishes bring a zippy bite and a pop of rosy color that livens up the veggie medley.
Thinly sliced, it offers a gentle sharpness and subtle sweetness, infusing the brine with mild onion flavor.
Any color will do—their crisp flesh soaks up the brine beautifully, adding both color and a mild, sweet crunch.
This tangy powerhouse is the base of the pickling liquid, delivering the signature tang that preserves and flavors the vegetables.
Dilutes the vinegar so that the acidity isn’t overpowering, allowing the veggies to absorb flavors more evenly.
Balances the acidity of the vinegar, rounding out the flavor profile with a touch of sweetness.
Enhances all the flavors and helps draw moisture from the vegetables, crucial for that classic pickle texture.
Minced cloves introduce aromatic depth and a subtle spicy kick that pairs perfectly with the crisp veggies.
Tiny bursts of spice, they add a gentle heat and light mustardy aroma throughout each bite.
Handfuls of these round gems punctuate the brine with warm, earthy spice notes.
Optional but recommended for those who crave a spicy edge; just enough to tingle the taste buds without overwhelming.
A garnish that brings a fresh, herby aroma and classic dill flavor, turning each jar into a pretty jarred bouquet.
Now that you’ve assembled your vibrant produce and aromatic pickling blend, it’s time to transform these fresh ingredients into bright, tangy pickles. The process is straightforward: prepare, brine, jar, and chill. Let’s walk through each step with a little more detail so you can pickle with confidence and flair.
1. Prepare your vegetables by washing them thoroughly. Slice the cucumbers, carrots, radishes, red onion, and bell pepper as stated in the ingredients list. Make sure they are in uniform sizes for even pickling—this ensures each piece absorbs the brine at the same rate and gives you perfectly crisp bites.
2. In a large mixing bowl, combine the sliced vegetables. You can mix them all together for a colorful medley or keep them separate if you prefer to layer flavors in individual jars. Both methods yield delightful results.
3. In a separate medium saucepan, combine the distilled white vinegar, water, sugar, sea salt, minced garlic, mustard seeds, black peppercorns, and red pepper flakes (if using). This is your pickling brine, so be sure to gather all the spices before heating.
4. Place the saucepan over medium heat. Stir occasionally until the sugar and salt dissolve completely, bringing the mixture to a gentle simmer. Once everything is fully dissolved and the brine is fragrant, remove the pan from heat.
5. Pour the warm vinegar mixture over the vegetables in the mixing bowl. Ensure all the vegetables are completely submerged in the liquid. If needed, use a spoon or spatula to press them down gently, preventing any air pockets.
6. Once the mixture has cooled for a few minutes, transfer the vegetables and the pickling liquid into clean glass jars. Seal them tightly with lids, making sure each jar is airtight to maintain freshness.
7. Place the jars in the refrigerator. Allow the vegetables to pickle for at least 24 hours for a noticeable tang, although 3–5 days is recommended for full taste development and deeper flavors.
8. When ready to enjoy, remove from the fridge and serve as a crunchy side or topping for sandwiches, salads, or tacos. Garnish with fresh dill if desired to add that lovely herby finish.
Once your veggies have absorbed all that zesty, garlicky goodness, you’re ready to elevate every meal with a crunchy, tangy twist. These pickles are incredibly versatile—they can turn an ordinary dish into something memorable, and they’re perfect for entertaining, quick lunches, or simply snacking right out of the jar. Delight your guests (or yourself!) with some of these fun and flavorful serving ideas.
Layer these pickles inside a turkey or ham sandwich to introduce a burst of tangy crunch. The acidity cuts through rich meats and cheeses, balancing every bite.
Scatter sliced pickled vegetables over a mixed greens salad. They act like a homemade vinaigrette in vegetable form, adding zesty flavor without extra dressing.
Arrange them alongside cured meats, cheeses, and crackers on a board. Their bright colors and sharp flavors complement the creamy and savory elements beautifully.
Use these pickles as a topping for fish or pork tacos. The crisp bite and peppery snap enhance the richness of the tortilla fillings, making every mouthful pop.
Proper storage is key to maintaining the exceptional crunch and vibrant taste of your refrigerator pickles. With a few simple tips, you can enjoy these tangy treats for up to four weeks, ensuring each jar remains as fresh and flavorful as the day you made it. Keep reading for guidelines on jar selection, sealing, and ideal fridge conditions.
Opt for clean glass jars with tightly sealing lids. Mason jars or recycled jam jars work perfectly. Ensure they’re sterilized by washing them in hot, soapy water and letting them dry completely before filling.
Store your jars in the coldest part of the fridge—usually the back shelf. Avoid placing them on the door, where temperatures fluctuate more when you open and close it.
After each use, press the vegetables back down so they remain submerged in the pickling liquid. This prevents spoilage and keeps the flavors evenly distributed.
Write the preparation date on masking tape or a label. This simple step helps you track freshness and ensures you enjoy your pickles within the recommended four-week window.
Thanks for exploring this recipe for Crunchy Tangy Refrigerator Pickled Vegetables! We’ve covered everything from key ingredients like pickling cucumbers, garlic, and mustard seeds to step-by-step instructions that walk you through slicing, brining, and chilling. Along the way, we’ve packed in colorful serving ideas—whether you’re boosting a sandwich, jazzing up a salad, or creating a showstopping charcuterie board. Don’t forget the storage tips that keep your pickles crisp and flavorful for up to a month, and remember to label your jars so nothing gets lost in the fridge shuffle. Feel free to print this article or stash it in your digital recipe box; it’s a handy reference whenever you’re craving a bright, tangy crunch.
I hope you’ve enjoyed this deep dive into a beginner-friendly pickling ritual that delivers professional-level taste with minimal fuss. These vibrant pickles are perfect for busy weeknight dinners, weekend meal prep, or sharing with friends at your next gathering. If you have any questions about slicing techniques, spice substitutions, or how long to ferment for extra zing, leave a comment below. I’d love to hear how your pickling adventure turns out, and I’m here to help troubleshoot any hiccups. Don’t hesitate to share your feedback or stories—happy pickling!
Bite into vibrant, crunchy veggies that burst with tangy flavor! These refrigerator pickles are easy to make and add zest to any meal. Perfect for snacks or as a side!

Ciao, beautiful souls! I'm Isabella Romano, and welcome to my kitchen where comfort meets creativity, and every recipe is designed to make your everyday cooking feel a little more special.