
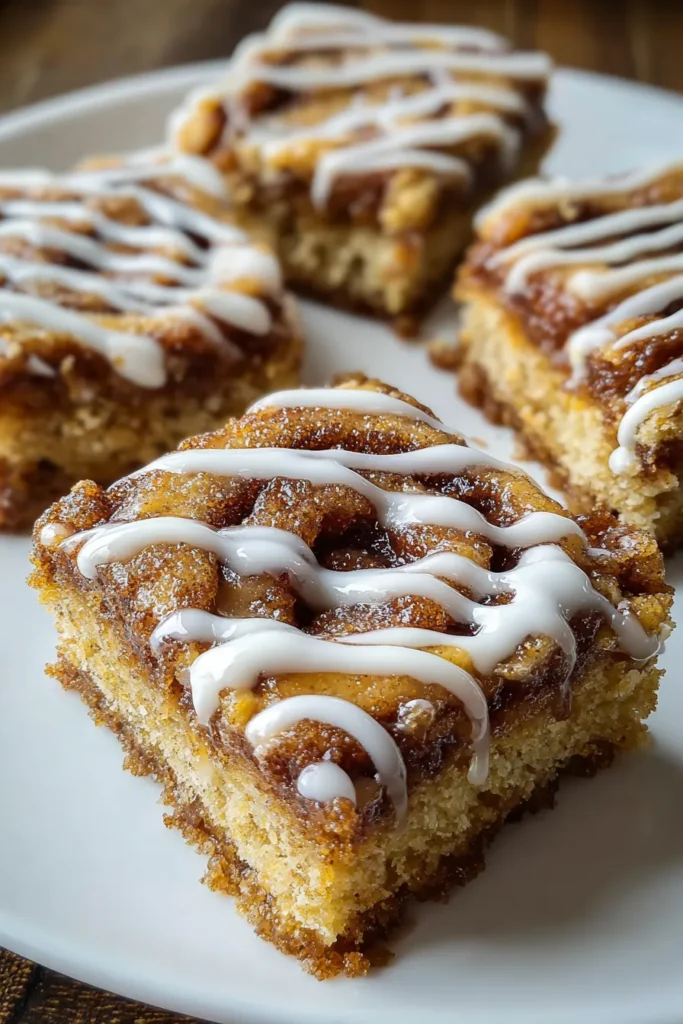
These Cinnamon Roll Bliss Bars are the kind of treat that turns an ordinary afternoon into a cozy celebration. Every bite offers the warmth of cinnamon and the tender crumb of a freshly baked bar, all swirled together in a sweet, gooey embrace. From the moment the buttery dough meets the pan, you know you’re in for something special. As they bake, that familiar scent of brown sugar, cinnamon, and vanilla drifts through the kitchen, instantly lifting my spirits and bringing back memories of casual weekend brunches with friends.
But these aren’t your grandma’s cinnamon rolls rolled out into a sticky mess—these bars are streamlined, fuss-free, and packed with all the flavors you love. The easy prep means you’ll spend less time kneading and more time enjoying, and the simple ingredients list keeps things approachable even for the most novice baker. Once you drizzle that silky glaze over the golden-brown top, each square becomes a miniature masterpiece of spice and sweetness. Trust me, by the time you taste that first warm, melting morsel, you’ll be hooked for life.
There’s something joyful about sharing a pan of these bars. I vividly recall gifting a batch to my neighbor one chilly December morning. She peeked through her door, bleary-eyed, and followed the smell right into her kitchen. One bite later, she was grinning ear to ear, spooning extra glaze off her plate! Moments like that remind me how baking is more than mixing ingredients—it’s creating memories and forging connections. Whether you’re starting a lazy weekend or need a quick dessert for a last-minute gathering, these Cinnamon Roll Bliss Bars have got you covered.
Before we dive into the kitchen action, let’s take a closer look at the stars of our recipe. Each ingredient plays its own part in transforming simple pantry staples into a batch of gooey, cinnamon-spiced bliss bars.
Provides the structure and tender crumb that holds everything together. It’s the backbone of the bars, giving them just enough heft without becoming dense.
Adds deep, caramel-like sweetness and moisture. Brown sugar’s molasses content ensures a soft, chewy texture and amplifies that warm, cozy flavor we crave.
Sweetens the batter while helping to create those delightful golden edges. It balances the richness of brown sugar for a perfectly sweet bite.
Acts as a leavening agent, gently lifting the bars to a light and fluffy height. It ensures a tender, pillowy interior.
Works alongside baking powder to give the bars a subtle rise and contributes to browning, creating a beautiful golden crust.
Enhances all the flavors, cutting through the sweetness and highlighting the cinnamon’s spicy warmth.
Injects the signature spice into every mouthful. Its aromatic, woody notes are what make this bake unmistakably “cinnamon roll.”
Brings rich, creamy moisture when melted into the batter. It coats each flour molecule for a melt-in-your-mouth texture.
Provide structure and act as a binding agent, lending moisture and a tender crumb.
Elevates the flavor profile with floral, sweet notes. It deepens the overall taste and complements the cinnamon perfectly.
Adds moisture and a slight tang, keeping the bars from drying out and giving them a luxuriously tender finish.
Offer bursts of intense cinnamon flavor throughout, creating pockets of gooey sweetness that melt in your mouth.
Forms the base of our silky glaze. Its superfine texture dissolves easily for a smooth finish.
Makes the glaze luxuriously rich and pourable, ensuring it drapes perfectly over the bars.
Mirrors the batter’s vanilla notes, tying every element together in the sweetest harmony.
A tiny pinch adds an extra hint of spice on top, letting that cinnamon spirit shine from interior to icing.
Ready to bake up some bliss? Follow these step-by-step instructions for a foolproof bake that will fill your kitchen with irresistible cinnamon-sugar flavors.
1. Preheat your oven to 350°F (175°C). Grease a 9x13-inch baking pan or line it with parchment paper to prevent sticking and ensure easy removal of the bars once they’re baked to golden perfection.
2. In a large mixing bowl, combine the flour, brown sugar, granulated sugar, baking powder, baking soda, salt, and ground cinnamon. Use a whisk or spatula and stir until the dry ingredients are thoroughly blended and no lumps remain.
3. Pour the melted butter into the dry ingredients and stir with a spatula until the mixture resembles coarse crumbs. This step ensures the butter coats each dry component, creating a tender texture.
4. In a separate bowl, whisk together the eggs, vanilla extract, and sour cream until the mixture is completely smooth. This wet blend adds richness and moisture to the batter.
5. Pour the wet mixture into the bowl with the dry mix. Use a rubber spatula to gently fold the ingredients together. Aim for a thick and smooth batter, being careful not to overmix, which can lead to toughness.
6. Fold in the cinnamon chips until they are evenly distributed throughout the batter, ensuring every bar gets those delightful cinnamon pockets.
7. Spread the batter evenly into the prepared baking pan, smoothing the top with your spatula for an even bake.
8. Bake for 25 to 30 minutes, or until a toothpick inserted into the center comes out clean and the top turns a beautiful golden brown.
9. Remove the pan from the oven and let the bars cool in the pan for about 10 minutes. Then transfer them to a wire rack to cool completely, preventing soggy bottoms.
10. While the bars are cooling, make the glaze. In a small bowl, mix together the powdered sugar, heavy cream, vanilla extract, and a pinch of ground cinnamon until the glaze is smooth and pourable.
11. Once the bars are cool, drizzle the glaze evenly over the top, using a spoon or piping bag. Allow the glaze to set before slicing into bars for clean, irresistible squares.
When it comes time to indulge, these cinnamon-sweet bars shine in so many delightful pairings and presentations. Whether you’re hosting a casual coffee date, a family brunch, or a festive dessert platter, these serving ideas will elevate your bake and have your guests begging for seconds. The key is to highlight the bars’ warm, gooey nature and that luscious glaze while introducing complementary flavors and textures that keep each bite interesting.
Warm bars meet melting ice cream in a dreamy partnership. Place a freshly baked bar on a small plate, top with a generous scoop, and watch the ice cream soften just enough to marry with the cinnamon-laced crumbs.
The spicy notes of cardamom and ginger in a creamy chai latte beautifully complement the cinnamon richness. Pour chai into your favorite mug and arrange a bar alongside for the ultimate cozy combo.
For an indulgent twist, add a swirl of pure maple syrup and scatter toasted pecans on top. The syrup brings a deeper sweetness, while the nuts add satisfying crunch and balance.
Line a festive tray with parchment and arrange the bars in neat rows. Garnish with a sprinkle of cinnamon or dust powdered sugar on top. Tie a ribbon around the platter for a charming edible gift.
Nothing feels worse than letting a batch of homemade bars go stale before you can enjoy them all. To maintain that tender chew and gooey glaze, proper storage is essential. These bars keep beautifully whether you’re saving them for tomorrow’s breakfast or planning to share them over the weekend. Follow these tips to lock in moisture, prevent sogginess, and preserve flavor.
Once completely cooled, stack the bars in a sealed container lined with parchment or wax paper between layers. They’ll stay fresh and soft for up to 3 days without refrigeration.
If you live in a warmer climate, keep the bars chilled for up to a week. Store them in a tightly sealed dish to prevent the glaze from absorbing fridge odors and maintain their chewy texture.
For longer storage, wrap individual bars in plastic wrap and place them in a freezer bag. They’ll keep for up to 3 months. Thaw at room temperature or warm briefly in the microwave.
Pop a bar into the microwave for 10–15 seconds or warm it in a low oven (300°F/150°C) for 5 minutes to revive the gooey center and toasty edges, making every bite feel freshly baked.
Baking these Cinnamon Roll Bliss Bars is more than just following a recipe—it’s about filling your home with warmth, sweetness, and the irresistible scent of cinnamon. We started by gathering simple pantry staples, then transformed them into a batch of tender, cinnamon-spiced bars crowned with a silky glaze. Along the way, you learned how each ingredient—from the all-purpose flour to the tangy sour cream and those delightful cinnamon chips—plays a pivotal role in creating the perfect crumb. You also discovered step-by-step tips for baking, serving, and storing so you can enjoy these bars any time, whether it’s a casual breakfast, an elegant dessert, or a thoughtful homemade gift.
Feel free to print this article and save it in your recipe binder for those moments when you need a sweet escape or a quick crowd-pleaser. You’ll also find a helpful FAQ below to answer any lingering questions about substitutions, baking times, or troubleshooting. I’m always excited to hear about your baking adventures—so if you try these bars or need a bit of guidance along the way, please leave your comments, questions, or feedback. Happy baking, and here’s to many blissful moments with every cinnamon-sweet bite!
These blissful bars are a delightful twist on traditional cinnamon rolls, featuring a rich cinnamon flavor and a creamy glaze that makes every bite irresistible. Perfect for any occasion!

Ciao, beautiful souls! I'm Isabella Romano, and welcome to my kitchen where comfort meets creativity, and every recipe is designed to make your everyday cooking feel a little more special.