
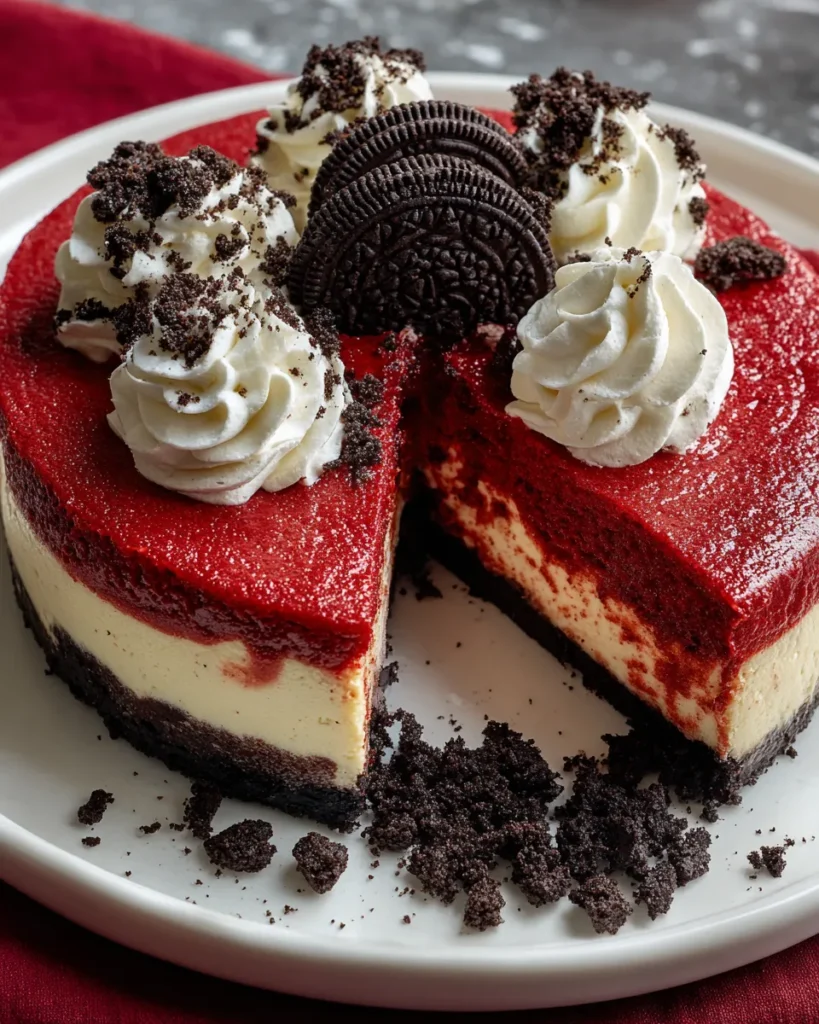
This festive cheesecake brings together the rich, velvety layers of cream cheese and traditional red velvet cake in a way that feels like a holiday miracle. Every forkful carries the perfect balance of tangy cream cheese, sweet cocoa, and a gentle hint of vanilla, all nestled atop a crisp, chocolatey Oreo crust. With 30 minutes of prep time, an hour in the oven, and about 5 hours of chill time (plus a bit of anticipation), this intermediate-level dessert transforms your Christmas table into a dazzling display. Whether you’re hosting family dinner or a cozy gathering of friends, this dessert delivers that “wow” factor you’ve been searching for. Serving twelve slices, each around 450 calories, this cheesecake is a showstopper that pairs beautifully with a steaming mug of cocoa or a festive cup of spiced tea.
You’ll love how the vivid red hue pops against the snowy white whipped cream and glistening berries, adding a splash of holiday cheer to every slice. The creamy red velvet cheesecake filling is luxuriously smooth—thanks to full-fat cream cheese and sour cream—and perfectly balanced by a subtle cocoa undertone and a dash of red food coloring for that signature red velvet look. Decorated with crushed Oreos and fresh berries (or even a sprinkle of edible glitter), it’s the ultimate dessert for celebrating in style. Dive in and experience a decadent blend of flavors and textures that feel both classic and refreshingly modern.
Before you begin assembling this festive masterpiece, let’s take a closer look at the star ingredients that make this cheesecake so irresistibly rich and strikingly beautiful.
These finely crushed cookies form a sturdy, chocolate-packed foundation. Their familiar sweetness and slight crunch offer a lovely contrast to the creamy filling.
When melted and mixed with the Oreo crumbs, butter creates a cohesive, buttery crust that holds its shape and delivers a rich mouthfeel without overwhelming salt.
The heart of our cheesecake filling, cream cheese provides a luxurious, tangy creaminess. Properly softened, it whips into a smooth base that carries the red velvet flavors flawlessly.
This simple sweetener dissolves easily into the cream cheese mixture, balancing its tang and adding just the right amount of sweet indulgence.
A splash of pure vanilla extract elevates the filling with a warm, aromatic depth, enhancing both the cocoa and cream cheese notes.
Eggs contribute structure and help the cheesecake set with a delicate texture. Beating them in one at a time ensures a cohesive batter without overmixing.
Adding a tablespoon of unsweetened cocoa powder introduces a subtle chocolate undertone, essential for that classic red velvet flavor profile.
This ingredient adds extra moisture and a slight tang, resulting in an ultra-smooth and creamy filling that doesn’t crack when baked properly.
The vibrant hue of red velvet comes from precise use of red food coloring, turning the filling into a festive, eye-catching centerpiece.
Light and airy, whipped cream crowns each slice with a fluffy topping, balancing the cheesecake’s richness and adding a snowy-white contrast.
Sprinkled on top, these morsels echo the crust’s chocolate crunch and lend an extra layer of texture and visual appeal.
Optional but delightful, berries such as raspberries or strawberries bring bright color, fresh flavor, and a hint of tartness to each bite.
Let’s walk through each step in detail so you can bake this showstopping cheesecake with confidence and ease, yielding that perfect creamy texture and festive appearance.
1. Preheat your oven to 325°F (160°C) and position a rack in the center. Proper oven temperature is crucial for even baking and preventing cracks.
2. In a medium bowl, combine the Oreo cookie crumbs and melted butter. Mix until the crumbs are fully coated and have a wet sand-like texture, ensuring an even, stick-together crust.
3. Press the mixture into the bottom of a 9-inch springform pan. Use the back of a measuring cup or your fingers to firmly pack the crust. Bake for 10 minutes, then remove and let the crust cool completely on a wire rack.
4. In a large mixing bowl, beat the softened cream cheese on medium speed with an electric mixer until smooth and creamy, scraping down the sides as needed to keep it lump-free.
5. Gradually add the granulated sugar, continuing to mix until fully incorporated and the batter looks silky.
6. Add the vanilla extract and mix again until the aroma is evenly distributed throughout the filling.
7. Introduce the eggs one at a time, beating well after each addition. This careful approach prevents overmixing and keeps the batter light.
8. Sift in the cocoa powder and blend on low speed until just combined, ensuring no dry pockets remain.
9. Gently fold in the sour cream and red food coloring with a spatula, using a cutting motion to preserve air in the batter and achieve a uniform, vibrant color.
10. Pour the red velvet cheesecake batter over the cooled Oreo crust, smoothing the top with a spatula for an even surface.
11. Bake for 55–60 minutes, or until the edges appear set but the center still has a slight jiggle when you gently shake the pan.
12. Turn off the oven and crack the oven door slightly, allowing the cheesecake to cool slowly for about 1 hour. This gradual cool-down helps prevent cracks on the surface.
13. Once cooled to room temperature, refrigerate the cheesecake for at least 4 hours, preferably overnight, to let it fully set and develop its rich flavors.
14. Before serving, top with whipped cream, crushed Oreos, and fresh berries if desired, arranging them artfully for a festive presentation.
When it comes time to share this festive showstopper, presentation and pairing can elevate each slice into an unforgettable holiday treat. Whether you’re plating slices for a buffet or serving them family style, the right accents will bring out every nuance of flavor and texture, ensuring that each bite feels celebratory. Here are some delightful ways to present and enjoy your red velvet cheesecake at its best:
Proper storage is key to preserving the delightful flavor, creamy texture, and vibrant color of this decadent cheesecake. Whether you’re making it a day in advance or saving leftovers for later indulgence, these storage tips will help maintain the fresh-from-the-oven magic:
From the first swirl of that rich red filling to the last crumb of Oreo crust, this Christmas Red Velvet Cheesecake with Oreo Crust offers a festive blend of flavors and textures that’s hard to forget. We’ve covered everything from the crunchy, chocolatey base to the silky, tangy cream cheese layer, all highlighted by a hint of cocoa and vanilla, finished with festive whipped cream, crushed Oreos, and fresh berries. With just 30 minutes of hands-on prep, an hour in the oven, and about 5 hours of chill time, you’ll have a dessert that not only looks spectacular but also tastes like holiday joy on a plate. This intermediate-level recipe serves twelve generous slices, making it perfect for family dinners, office parties, or cozy celebrations. Don’t worry about cracks—slow cooling in the oven and an overnight chill in the fridge set you up for a perfectly smooth surface every time.
Feel free to print this article or save it for your holiday baking plans. Below, you’ll find a FAQ section to answer any questions you might have as you mix, bake, and chill your way to cheesecake perfection. If you try the recipe or need help at any stage—whether it’s achieving that flawless crust or getting the color just right—I’d love to hear from you. Share your successes, your tweaks, or any questions you might have in the comments. Your feedback and stories make this festive recipe even more special, and I can’t wait to see how your holiday cheesecake turns out!
Experience the luscious layers of creamy red velvet cheesecake atop a crispy Oreo crust, blended with hints of cocoa and vanilla that will enchant your taste buds this holiday season.

Ciao, beautiful souls! I'm Isabella Romano, and welcome to my kitchen where comfort meets creativity, and every recipe is designed to make your everyday cooking feel a little more special.