
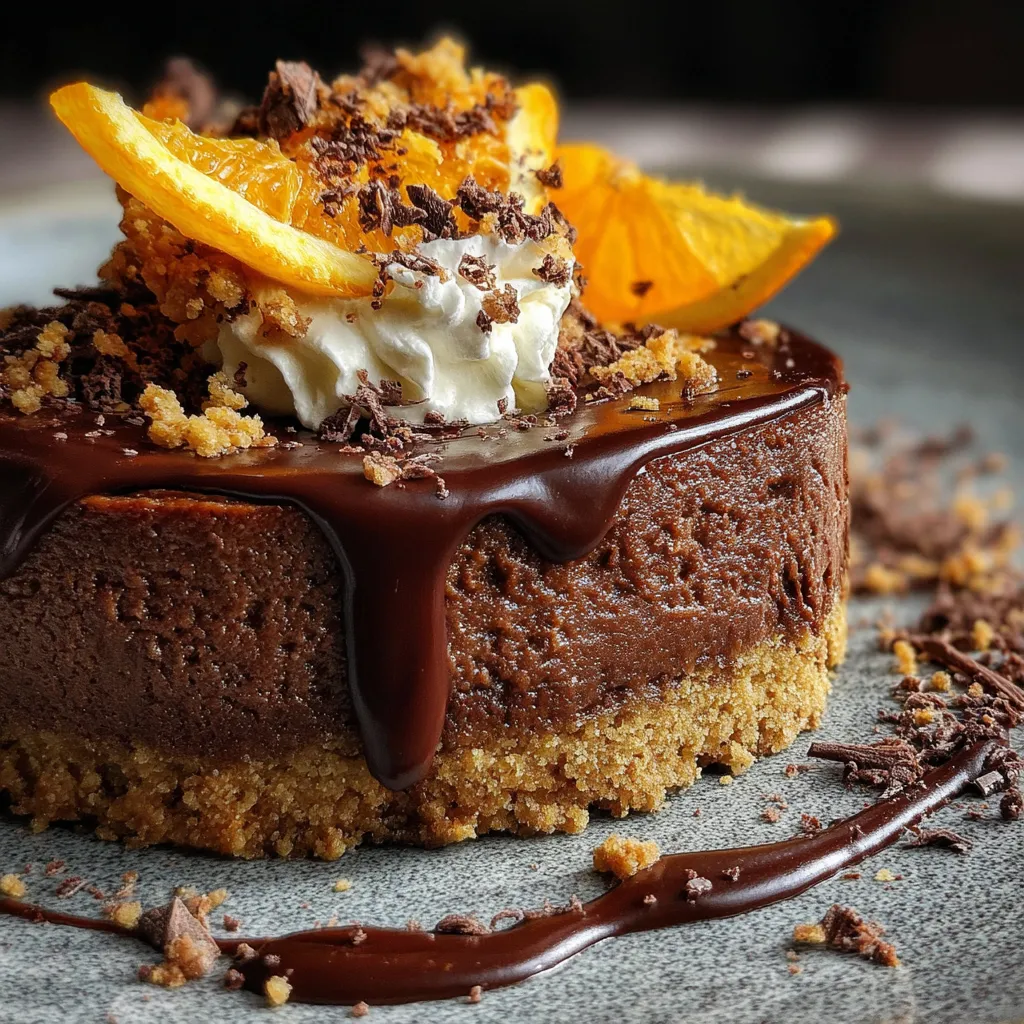
Chocolate Orange Cheesecake brings together a crisp digestive biscuit base, a velvety dark chocolate filling brightened by fresh orange zest, and a swirl of citrus zing in every bite. This dessert hits the perfect balance between smooth richness and a refreshing pop of orange, making it a standout treat for any gathering or cozy night in. Give it a go—you’ll love how easy it is to impress friends (or yourself) with this decadent yet approachable cheesecake.
Before you start baking, gather these essentials to build your crunchy crust and luscious, cocoa-packed filling:
Turn these simple ingredients into a show-stopping dessert with straightforward steps. From preparing the crunchy base to pouring and baking the silkiest chocolate-orange filling, this recipe guides you through each stage with clear techniques for a flawless finish and that irresistible citrus twist.
1. Preheat your oven to 160°C (320°F). Grease a 9-inch springform tin with butter or line it with parchment to ensure easy removal.
2. In a bowl, combine the crushed biscuits and melted butter. Mix thoroughly until every crumb is coated, creating a uniform, moist texture.
3. Press the mixture firmly into the tin’s base, using the back of a spoon to compact it into an even layer. Chill in the refrigerator to set while you tackle the filling.
4. In a clean mixing bowl, beat the room-temperature cream cheese and powdered sugar on medium speed for 2–3 minutes until smooth and aerated.
5. Slowly add the cooled melted chocolate to the cream cheese, mixing continuously to create a glossy, even batter without scrambling.
6. Incorporate the eggs one at a time, ensuring each is fully blended before adding the next. Scrape down the bowl sides to keep the mixture uniform.
7. Stir in the orange zest, orange juice, vanilla extract, and a pinch of salt until just combined—avoid overmixing to maintain a tender crumb.
8. Pour the filling over your chilled crust, smoothing the top with a spatula for an even surface.
9. Bake for 45–50 minutes, or until the edges are set and the center still has a gentle jiggle when you shake the tin.
10. Cool inside the oven: turn it off, crack the door open, and let the cake rest for about an hour to prevent cracks from rapid temperature change.
11. Refrigerate the cheesecake, uncovered, for at least 4 hours or ideally overnight to achieve a firm, sliceable texture.
12. Garnish with whipped cream and chocolate shavings just before serving for an elegant finishing touch.
A perfectly chilled slice deserves thoughtful presentation. Let your cheesecake sit at room temperature for 10 minutes before cutting to avoid cracks and ensure clean slices. Use a sharp, warm knife (dip it in hot water and wipe dry) to glide through the cake. Here are a few ideas to elevate each plate:
Nailing a flawless cheesecake is all about patience and the right ingredients. Keep your tools and ingredients at the ready, and give yourself plenty of chilling time for the best texture and flavor harmony. Here are some friendly pointers to ensure your dessert shines:
Once you’ve swooned over that first bite, keep your cake in prime condition with proper storage. A well-chilled cheesecake retains its lush texture and vibrant flavors longer, so avoid temperature swings and moisture exposure.
Got a few lingering curiosities? Here are the answers to the most common cheesecake conundrums:
A: Preparation takes about 15–20 minutes (crushing biscuits, mixing ingredients, and preheating the oven). Baking requires 45–50 minutes at 160°C (320°F). After baking, let the cheesecake cool in the oven with the door ajar for about 1 hour, then refrigerate for at least 4 hours (ideally overnight) to set properly. In total, you’re looking at around 6–7 hours from start to serving.
A: Press the crushed digestive biscuits and melted butter firmly and evenly into the springform tin, using the back of a spoon to compact the layer. Chilling the base in the refrigerator while you prepare the filling helps the butter solidify and locks in the structure. If you prefer extra protection, you can brush the chilled base with a thin layer of melted dark chocolate and allow it to set before adding the cheesecake mixture.
A: A slight jiggle in the center when you remove the cake from the oven is normal and indicates a creamy texture. As it cools, the residual heat will finish cooking the center gently without overbaking. If the center is completely liquid, you may need an extra 5–10 minutes in the oven, but watch closely to avoid overcooking the edges.
A: Cracks often result from rapid temperature changes. After baking, turn off the oven, crack the door open, and let the cheesecake cool inside for about an hour before moving it to room temperature. This gradual cooling prevents the edges from contracting too quickly. Also, ensure all ingredients are at room temperature before mixing to create a smooth, uniform batter that bakes evenly.
A: Yes. For a gluten-free option, use certified gluten-free biscuits or crushed gluten-free graham crackers. To make the cheesecake dairy-free, replace cream cheese with a plant-based cream cheese and use vegan butter for the crust. Ensure your dark chocolate is dairy-free, and follow the recipe steps exactly, keeping ingredient temperatures consistent.
A: For a bolder chocolate taste, use extra dark chocolate (80% cocoa) or fold in finely chopped chocolate pieces after step 5. To boost the orange flavor, increase the zest to 2 oranges and reduce the juice to 80 ml to avoid thinning the batter. You can also add a teaspoon of orange liqueur such as Cointreau for an aromatic lift.
A: Absolutely. Cheesecakes often taste better after macerating in the fridge overnight. Once fully chilled, cover the tin with plastic wrap or transfer slices to an airtight container. Store in the refrigerator for up to 4 days. For longer storage, you can freeze individual slices wrapped tightly in foil and plastic wrap for up to 1 month; thaw in the fridge before serving.
This Chocolate Orange Cheesecake stands out for its perfectly balanced layers: a crisp, buttery crust, a velvety dark chocolate filling, and a vibrant burst of orange zest. The baking technique—coupled with a gentle cool-down in the oven—ensures no cracks and an irresistibly smooth center. Whether you’re planning ahead or surprising guests last minute, this dessert impresses every time. Feel free to print and save this recipe for future celebrations, and drop a comment if you have any questions, twists to share, or simply want to gush about how it turned out!
Creamy chocolate-orange filling swirls with dark cocoa and citrus zing atop a crunchy biscuit crust. Each bite balances smooth richness with a bright orange twist and a hint of vanilla.

Ciao, beautiful souls! I'm Isabella Romano, and welcome to my kitchen where comfort meets creativity, and every recipe is designed to make your everyday cooking feel a little more special.