
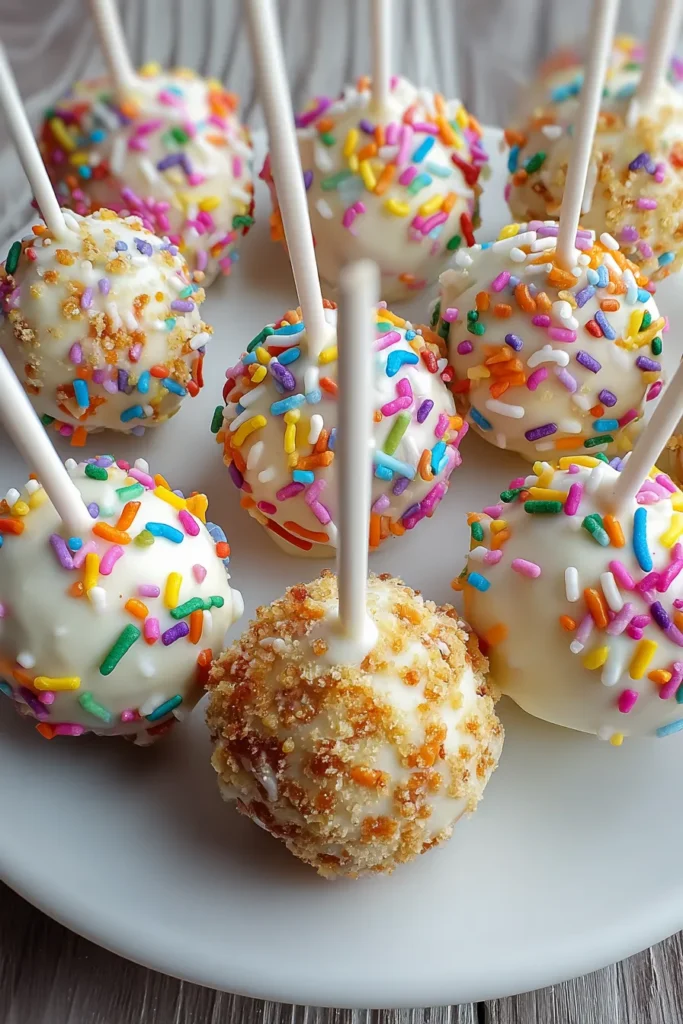
When birthdays roll around, there’s nothing quite as playful and joyful as a little pop of sweetness that looks as good as it tastes. These Birthday Cake Pops are like bite-sized confetti on a stick—each one bursts with that classic funfetti flavor and a swirl of rainbow sprinkles that instantly lifts the mood. They’re the perfect combination of moist, tender cake mixed with creamy vanilla frosting, all wrapped in a crisp, white chocolate shell that snaps delightfully with every bite. If you’re looking to surprise your guests, delight the kids (and big kids alike), or simply treat yourself to a whimsical dessert, these cake pops are exactly what you need. They’re beginner-friendly, beginner-level dessert magic that takes just 30 minutes of hands-on prep, 30 minutes of baking, and another 30 minutes of chill time before you dip, decorate, and display them in all their colorful glory.
I still remember the first time I tried my hand at cake pops during a weekend baking marathon. Armed with a simple funfetti cake mix and a tub of vanilla frosting, I crumbled, rolled, and dipped until my countertop looked like a sprinkle party exploded. But the payoff was worth every sticky swipe on my fingers: a tray full of adorable, mouthwatering pops that transformed my kitchen into a birthday celebration. With each pop clocking in at around 160 calories, they’re the perfect portion-controlled treat for any gathering. Whether you’re planning a big bash or a cozy family get-together, these pops bring an instant burst of color and cheer—no special skills required, just a little enthusiasm and a willingness to embrace a bit of kitchen mess in exchange for something truly magical.
Every delightful cake pop starts with a handful of simple ingredients that come together to create those irresistible little spheres of fun. From the base that bakes up soft and fluffy to the glossy coating that gives each pop its shine, every element plays an important role in taste, texture, and presentation.
Provides the light and tender cake base, complete with interior sprinkles for a playful texture. This mix delivers consistent rise and a sweet vanilla flavor that carries through each bite.
The classic trio that activates the cake mix, creating the perfect batter consistency. Eggs add structure, oil builds moisture, and water helps the ingredients meld into a smooth, luscious cake.
Acts as a binder when mixed into the crumbled cake, adding creaminess and extra vanilla sweetness. It helps the balls hold their shape and adds a richer taste profile.
Melt into a silky, glossy coating that sets firmly around each ball. This shell protects the cake interior and creates a satisfying snap when you bite in.
Sprinkle bright pops of color and a hint of crunch onto each cake pop. They stick beautifully to the warm coating, instantly dialing up the festive factor.
Provide sturdy handles for dipping and eating. They ensure each pop is perfectly balanced and easy to display or hand out.
Holds the pops upright as the coating hardens, preventing smudges and helping them dry evenly for picture-perfect presentation.
Ready to transform a boxed mix and a few simple extra ingredients into adorable, delicious pops that brighten any celebration? Follow these straightforward steps, and you’ll be dunking and decorating in no time—no fancy equipment required, just a little patience and creativity.
1. Preheat your oven to the temperature specified on the cake mix box. Combine the cake mix with the eggs, oil, and water following the package instructions, stirring until you have a smooth batter. Grease your baking dish, then pour in all the tasty mixture.
2. Bake the cake according to the package guidelines until it springs back lightly to the touch and a toothpick comes out clean. Remove it from the oven and let it cool completely on a wire rack so it’s easy to handle later.
3. Once the cake has cooled, use your hands to crumble it into fine, even crumbs in a large mixing bowl. This ensures a uniform texture when you roll the balls.
4. Add the vanilla frosting to the crumbs, then mix thoroughly with a spatula or clean hands until the crumbs are moist and stick together when you squeeze them.
5. Shape the mixture into bite-sized balls, about an inch in diameter, and place them on a baking sheet lined with parchment paper. Cover and refrigerate for at least 30 minutes, or until they’re firm.
6. While the cake balls chill, melt the white chocolate chips or candy melts in a microwave-safe bowl. Heat in 30-second intervals, stirring well between each until you achieve a completely smooth, glossy coating.
7. Remove the chilled cake balls. Dip the tip of each cake pop stick into the melted chocolate, then carefully insert it halfway into each ball—this helps the stick stay securely in place.
8. One by one, fully dip each cake pop into the melted chocolate, gently tapping off any excess so the coating is neat and even.
9. Immediately sprinkle the top with rainbow sprinkles before the coating sets, ensuring they adhere beautifully.
10. Place each finished pop upright into your styrofoam block or cake pop stand, making sure they don’t touch while the coating hardens completely.
11. Once the shell is fully set, your Birthday Cake Pops are all ready to be enjoyed!
Bringing these Birthday Cake Pops to the table is half the fun—the way you display and pair them can elevate a simple dessert into a show-stopping centerpiece. Whether you’re hosting a big bash, a small family gathering, or just treating yourself, these suggestions will help you serve each pop with style, making your celebration even more memorable. Think beyond a plain platter and play with height, textures, and complementary flavors to create an unforgettable dessert experience that delights both the eyes and the taste buds.
Once you’ve mastered the art of making these cute and colorful cake pops, you’ll want to keep them fresh, moist, and beautiful until serving time. Proper storage ensures the coating remains crisp, the cake inside stays tender, and the colors don’t bleed. Whether you need to prep them a day in advance or preserve leftovers for later enjoyment, the right technique can help you maintain the pops’ flavor, texture, and festive presentation. Read on for a few key methods that protect your treats without sacrificing taste.
Baking a batch of Birthday Cake Pops is not just about following a recipe—it’s about creating moments of joy, surprise, and color that turn any gathering into a celebration. From the first crumbly mix of funfetti cake and vanilla frosting to the final dip and sprinkle, each step is an invitation to play, experiment, and share your personality. This beginner-friendly dessert, with its quick 30-minute prep, 30-minute baking, and 30-minute chill time, fits seamlessly into any party plan. The finished pops are adorable, portable delights that guests of all ages will line up to taste. Best of all, each serving clocks in at around 160 calories, so you can feel good about offering a sweet treat in sensible portions.
Feel free to print this entire article and tuck it into your recipe binder or digital folder for whenever you need a burst of birthday fun. You can save a copy for future celebrations, share it with friends who are new to cake pops, or revisit it as you customize flavors and colors for upcoming events. Below, you’ll find a handy FAQ section to answer any lingering questions you might have, from troubleshooting tips to creative twists. If you give these cake pops a try, I’d love to hear how they turned out! Drop a comment, share a photo, or ask any questions if you hit a snag while rolling, dipping, or decorating. Your feedback and stories inspire me—and other home bakers—to keep experimenting, learning, and spreading joy, one rainbow-sprinkled pop at a time.
These adorable cake pops capture the joy of birthdays with their funfetti flavor and colorful sprinkles. Perfectly bite-sized, they're a delightful treat for any party!

Ciao, beautiful souls! I'm Isabella Romano, and welcome to my kitchen where comfort meets creativity, and every recipe is designed to make your everyday cooking feel a little more special.