
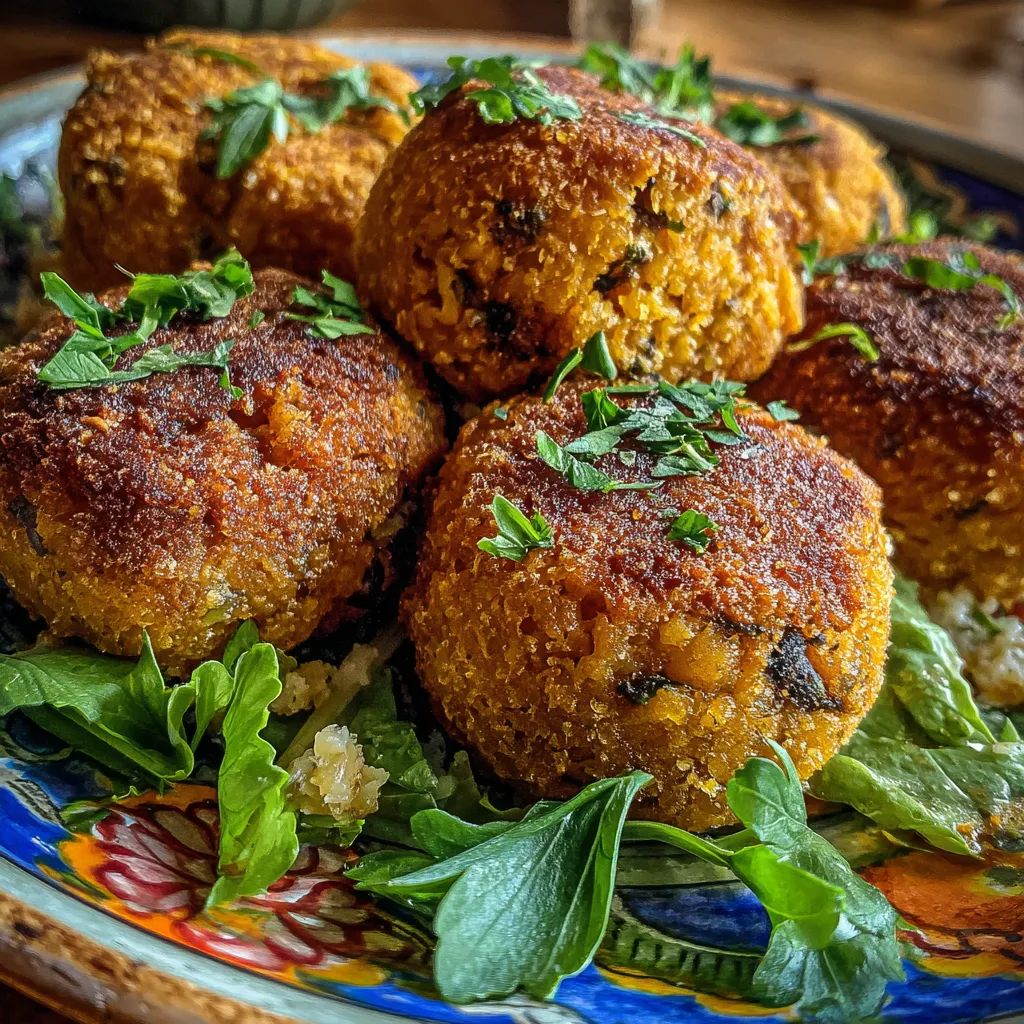
Baked Chickpea and Rice Balls are your new go-to snack when you crave something crispy on the outside and tender on the inside. These bite-sized gems bring together mashed chickpeas, fluffy rice, garlic, parsley, and Parmesan for a golden, guilt-free appetizer that’s impossible to resist. Whether you’re hosting a casual get-together or whipping up a simple lunch, these balls bake up with a crunchy crust and a soft, savory center that will have everyone asking for seconds.
Before you dive in, let’s take a look at the stars of this recipe and what makes each one essential:
Ready to roll up your sleeves? This recipe comes together in just a few simple steps, perfect for beginners. You’ll mix, shape, and bake for about 25 minutes, and before you know it, you’ll have a tray of perfectly browned balls with a soft, savory center. Let’s get started:
1. Preheat your oven to 375°F (190°C) and line a baking sheet with parchment paper to prevent sticking and ensure easy cleanup.
2. In a large bowl, combine the mashed chickpeas and cooked rice, stirring well so the textures blend evenly.
3. Add the beaten egg, grated Parmesan cheese, breadcrumbs, minced garlic, chopped parsley, salt, pepper, and paprika, then mix until the ingredients are thoroughly incorporated.
4. Using your hands or a cookie scoop, shape the mixture into golf ball–sized balls and arrange them on the prepared baking sheet, leaving space for even browning.
5. Lightly brush each chickpea and rice ball with olive oil to help them develop a golden, crispy crust.
6. Bake for 20 to 25 minutes, turning once halfway through, until they’re firm and beautifully browned on all sides.
7. Remove from the oven and let the balls cool for a few minutes—this helps them firm up and makes them easier to handle before serving.
These versatile bites are great straight from the oven or dressed up for any occasion. Here are a few ideas to inspire your next gathering:
Nailing these baked balls is all about small tweaks and personal touches. Whether you’re aiming for extra crispiness or a gluten-free swap, these friendly tips will have you mastering the recipe in no time:
Keeping your chickpea and rice balls fresh is a breeze and ensures you always have a tasty snack on hand. Follow these simple methods to maintain flavor and texture:
Here are answers to some common queries to help you get perfect results every time:
A: It takes about 10 to 15 minutes to mash the chickpeas, combine the ingredients, and shape the balls, plus 20 to 25 minutes of baking time for a total of approximately 35 to 40 minutes. Be sure to allow a few minutes to preheat the oven to 375°F (190°C).
A: Thoroughly mash the chickpeas so there are no large chunks, and mix all ingredients until well combined to distribute moisture and binding agents. If the mixture seems too wet, stir in an extra tablespoon of breadcrumbs or grated Parmesan; if it’s too dry, add a splash of water or an additional beaten egg white. Press the mixture firmly when forming each ball and let them rest on the baking sheet for a couple of minutes to allow the breadcrumbs to absorb excess moisture before baking.
A: You can experiment by adding spices like ground cumin, smoked paprika, or chili flakes for heat, or folding in finely chopped olives, sun-dried tomatoes, or diced roasted red peppers for extra flavor and texture. Fresh herbs such as cilantro, dill, or basil can replace or complement the parsley. Just be mindful of moisture content when adding extra ingredients; squeeze out any excess liquid from vegetables to keep the mixture binding properly.
A: To make these chickpea and rice balls gluten-free, substitute regular breadcrumbs with gluten-free breadcrumbs, crushed gluten-free crackers, or almond flour. Alternatively, omit the breadcrumbs entirely and increase the Parmesan cheese by a couple of tablespoons to help bind the mixture. Always check that your Parmesan and other seasonings are certified gluten-free to avoid hidden sources of gluten.
A: These balls are delicious served warm as an appetizer or side dish. They pair beautifully with creamy tzatziki, marinara sauce, a yogurt-dill sauce, hummus, or a spicy harissa dip. For a heartier meal, top them with extra marinara and melted mozzarella, or bowl them over a fresh salad or leafy greens dressed with lemon vinaigrette.
A: After the balls have cooled completely, store them in an airtight container in the refrigerator for up to three days. For longer storage, freeze them in a single layer on a baking sheet until firm, then transfer to a freezer bag or container for up to two months. To reheat, bake frozen or refrigerated balls at 350°F (175°C) for 8 to 10 minutes until heated through and crisp; alternatively, microwave them for 1 to 2 minutes for a softer texture.
These Baked Chickpea and Rice Balls stand out thanks to their golden-crispy crust and the melody of herbs, garlic, and Parmesan in every bite. They’re not just vegetarian and beginner-friendly, but adaptable too—swap in your favorite spices or make them gluten-free with a quick tweak. The soft center of chickpeas and rice is comfort food magic at its best. Go ahead, print this article, save it for later, and let me know how they turned out—or drop a question if you need a little extra help!
These bite-sized balls bake up with a golden, crispy crust and a soft, savory center of chickpeas, rice, garlic, and cheese. Serve them warm with your favorite dip for a simple, crowd-pleasing snack.

Ciao, beautiful souls! I'm Isabella Romano, and welcome to my kitchen where comfort meets creativity, and every recipe is designed to make your everyday cooking feel a little more special.