
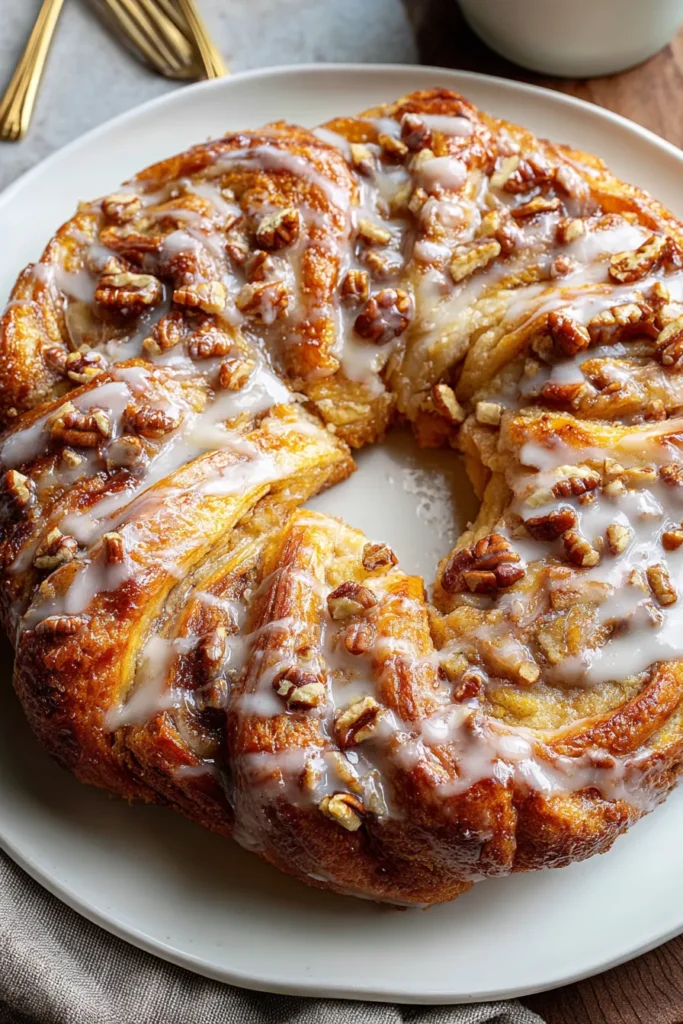
There’s something almost magical about pulling a golden-brown pastry from the oven, its crisp layers giving way to a tender, buttery crumb as you slice into it. This Apple Kringle with Vanilla Glaze is exactly that kind of treat—a delightful twist on a classic, combining flaky dough, sweet-tart apple filling, crunchy pecans, and a smooth drizzle of vanilla sweetness. With an intermediate difficulty level, it’s the perfect weekend project for home bakers looking to flex their pastry muscles. You’ll spend about 30 minutes on prep, 25 minutes on baking, and let the dough rest for another half hour, making this a recipe that rewards a bit of patience with unbelievable flavor.
When my kitchen first filled with the scent of cinnamon-spiced apple and melting butter, I knew I had a new favorite. The blend of textures—from the tender, slightly tangy sour cream dough to the cinnamony apple pie filling and crunchy pecan bits—makes every bite an adventure. And don’t even get me started on that vanilla glaze: it ties everything together with a creamy sweetness that feels nostalgic, like Sunday brunch at Grandma’s house. This recipe yields about eight servings at roughly 350 calories each, making it perfect for sharing around the table or savoring in blissful solitude with a cup of coffee or tea.
Before we dive into the step-by-step, let’s highlight the stars of our Apple Kringle. Each ingredient plays its part to create that signature balance of rich, flaky pastry and sweet, spiced filling, all finished with a silky vanilla glaze that brings it home.
The backbone of our dough, providing structure and flakiness when combined with cold butter and sour cream.
Adds a touch of sweetness to the dough, ensuring the pastry contrasts perfectly with the tart apple filling.
Enhances all the flavors, balancing sweetness and rounding out the buttery notes in the pastry.
Cut into small pieces, it creates those irresistible flaky layers when worked into the flour mixture.
Brings moisture and a subtle tang, yielding a tender and pliable dough that’s easy to roll.
The heart of the pastry—sweet-tart apples coated in warming spices that complement the buttery crust.
For a nutty crunch, adding texture and a toasty flavor that plays off the soft apples.
Infuses the filling with warmth and depth, a classic pairing with apples that never disappoints.
The base for our vanilla glaze, providing smooth sweetness and the right consistency for drizzling.
Thins the glaze to a pourable texture, ensuring a delicate coating that seeps into every crevice.
Imparts fragrant warmth, lifting the glaze from simple icing to a luscious finish.
Ready to roll—literally and figuratively? This section will guide you through each step to transform simple pantry staples into a show-stopping pastry. Follow along closely, and don’t be afraid to practice those pastry-cutting and rolling techniques for perfect results.
1. Preheat your oven to 375°F (190°C) and line a baking sheet with parchment paper to prevent sticking and make cleanup effortless.
2. In a large bowl, whisk together the flour, sugar, and salt until evenly combined. Add the cold butter pieces and use a pastry cutter or two knives to cut the butter into the flour until the mixture resembles coarse crumbs with pea-sized bits of butter.
3. Stir in the sour cream just until the dough comes together—don’t overmix. Cover the bowl and refrigerate for about 30 minutes, which firms up the dough and makes it much easier to handle when rolling.
4. On a lightly floured surface, roll the chilled dough into a rectangle about 12x8 inches. Spread the apple pie filling evenly over the dough, leaving a 1-inch border on all sides so the filling won’t spill out.
5. Sprinkle the chopped pecans and ground cinnamon over the apple layer, distributing them evenly to ensure crunch and spice in every bite.
6. Starting from one of the long edges, gently roll the dough into a log, tucking in the edges as you go to seal the filling inside. Transfer the log seam-side down to the prepared baking sheet.
7. Use your hands to slightly flatten the log into an oval shape. With a sharp knife, make a few shallow slashes across the top to allow steam to escape and help the kringle bake evenly.
8. Bake for 20–25 minutes or until the pastry is golden brown and crisp. Remove from the oven and let it cool on a wire rack for about 10 minutes so it holds its shape.
9. While the kringle cools, whisk together the powdered sugar, milk, and vanilla extract in a small bowl until the glaze is smooth and pourable.
10. Drizzle the vanilla glaze over the warm kringle, letting the icing settle into the slashes and accentuate every flaky layer. Allow the glaze to set fully before slicing and serving.
After all that hard work, you’ll want to serve your kringle in style. This section is all about plating, pairing, and presentation, so your beautiful pastry gets the spotlight it deserves.
Serve generous wedges while still slightly warm, topped with a dollop of fresh whipped cream. The cool cream contrasts perfectly with the warm filling.
Pair each slice with a bold coffee or a spiced chai latte. The robust flavors cut through the sweetness, creating a balanced tasting experience.
Display the whole kringle on a wooden cutting board surrounded by fresh berries and mint sprigs. Encourage guests to slice their own pieces for an interactive brunch moment.
Place a warm slice on a dessert plate and add a scoop of vanilla or cinnamon ice cream on the side. The melting ice cream creates a dreamy sauce that mingles with the glaze.
Proper storage ensures your kringle retains its flaky texture, tender crumb, and sweet glaze for days. Whether you want to prep ahead or savor leftovers, these tips will keep your pastry at its best.
When you’re finished serving, allow the kringle to cool completely to prevent moisture from building up inside the container. Excess heat can lead to sogginess and dull the glaze’s shine. Once cooled:
Place the cooled kringle in an airtight container or wrap it tightly in plastic wrap. It will stay fresh for up to 3 days on the counter, ready for a quick sweet bite.
For an extra day of freshness, refrigerate the wrapped kringle in an airtight box. Let it sit at room temperature for about 20 minutes before serving to soften the pastry.
Cut the kringle into individual portions, flash-freeze on a parchment-lined tray, then transfer slices to a zip-top bag. Freeze for up to 1 month. Thaw overnight in the fridge or at room temperature before reheating.
Warm slices in a 300°F oven for 5–7 minutes or in a toaster oven on low until the crust is crisp again and the filling is heated through. Avoid the microwave to keep the layers flaky.
This Apple Kringle with Vanilla Glaze has all the elements that make a dessert memorable: a buttery, flaky shell; a warmly spiced apple-and-pecan filling; and a smooth, sweet glaze that ties it all together. We explored each ingredient’s role, walked through step-by-step instructions, and shared serving and storage ideas to ensure your kringle shines from bake to bite. Whether you’re an experienced baker or tackling an intermediate recipe for the first time, this guide provides everything you need to succeed. Feel free to print this article and save it for future baking adventures, and scroll down to find a FAQ section that addresses common questions about technique, substitutions, and troubleshooting.
I’d love to hear how your kringle turns out! Did the dough roll smoothly? Did the glaze set just right? Leave a comment below with your experience, questions, or feedback. If you need help with any step—whether it’s perfecting those pastry layers or getting the filling distribution just right—I’m here to chat. Happy baking!
This delightful Apple Kringle features flaky pastry filled with sweet apple pie filling and crunchy pecans, all drizzled with a creamy vanilla glaze that ties it together beautifully.

Ciao, beautiful souls! I'm Isabella Romano, and welcome to my kitchen where comfort meets creativity, and every recipe is designed to make your everyday cooking feel a little more special.